Whether you should pre-germinate seeds or sow them directly into the ground, highly depends on the kind of seed, the season, or your patience.
I had a 4th reason to pre-germinate my beans this year because I wanted to show the process to my grandsons. They live in an apartment building and have a balcony that has some pots. I wanted to stimulate their enthusiasm to get started on their own.
Back in the Netherlands years ago as well as now in Spain I had tried several times to pre-sprout beans using methods I found on the internet. Until this year I rarely succeeded, they molded long before they sprouted.
Some of the links are affiliate links. As an affiliate associate, we earn a commission when you purchase any of the products offered through the shared links at no extra cost for you. This helps us maintain this website.
Table of contents
Should we pre-germinate seeds?
Often it is better to sow directly into the ground. But if seeds don’t sprout or if you want to check if the seeds are viable, it is useful to know the correct method to pre-germinate seeds.
Pre-germinating seeds
Reasons to pre-germinate seeds are:
- It is a bit too late in the season and pre-germinating speeds up the process;
- Thinning out seeds is not necessary, as only the sprouted seeds can be planted in the right place;
- It conserves space because there will be no empty spots;
- Maybe the seeds are old and a check is necessary to see if they are viable.
The best method
The method that works is the best, so the method that works for me at the moment doesn’t have to be the best method for you. Experiment with different ways of pre-sprouting.
Usually, it is shown that the seeds need to be covered with wet paper. My seeds always ended up molded when I did that.
So this is the method that works best for me:
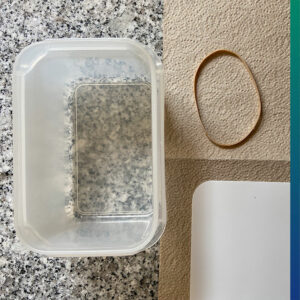
You will need a plastic or glass container, a paper towel (I use 2 pieces), a rubber band, and a sheet of hard plastic. The sheet I have is a leftover of smoked salmon I bought. If you don’t have a sheet like that, cover a cardboard plate with plastic wrap.
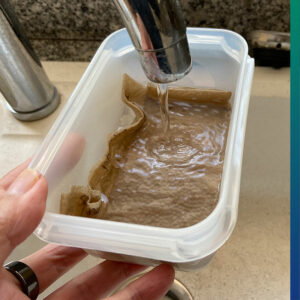
Fold the paper towel to form a raised edge. Write down in advance on the paper or in a separate note which seeds you are going to put in it. Unless the seeds are easily recognizable. Make the paper soaking wet.
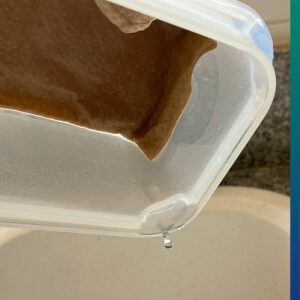
Let the excess water drain out until no more drops fall off. Press the paper on the bottom and in the corners.
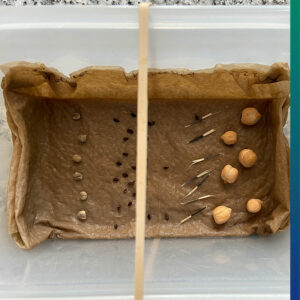
Place the seeds in it and put the rubber band around the container.
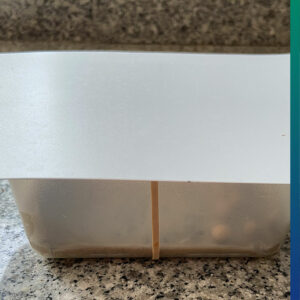
Cover the container with the plastic sheet. The rubber band ensures that the top is not completely closed so that enough air can get in and circulate.
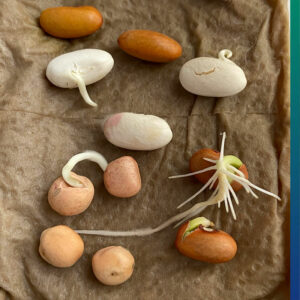
Check every day to see if there are any roots and if the paper is not drying out. However, be careful with re-moistening as it will quickly become too much and cause mold.

Disappointing results
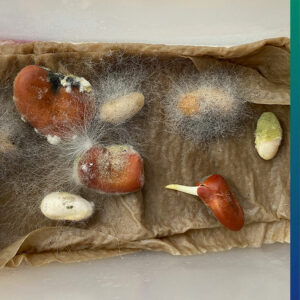
If the result of the pre-sprouting is not as expected, you can make changes to the process.
Are the seeds not sprouting?
Sometimes it helps to soak the seeds in water for 4 to 12 hours before you put them in the container. This works especially well for beans and peas.
Is the season right?
In Northern Europe, the seasons are different than in the South. Here in Spain I can still pre-sprout or sow directly into the ground in October. I didn’t have to try that in the Netherlands because it is too dark and too cold in the fall over there.
Was it warm enough?
The ideal growing temperature is about 24C or 75F. I have morning sun in my room and those warm rays behind the glass seem to work well. Do not place your container directly on the central heating, because that heat is too direct.
What about the humidity?
You have to experiment to find out what works best for you. If the inside of the container is too dry, you can carefully place a damp paper towel over the seeds. If it is too wet, it is best to leave the plastic cover off for a while.
Storing seeds
Mold while pre-germinating, can occur if the seeds are too old or have not been stored properly. Preserving the seeds is an art in itself. But in my opinion, just as nice a part of having a vegetable garden as the other activities.
The most important thing is that the seeds are kept dry, airtight, and cool. We have an unplugged fridge in the garage that I use to store my seeds.
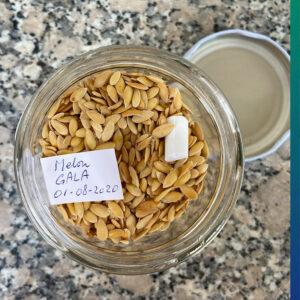
You can put a large amount of seed in a glass jar with a lid. Add a piece of chalk to absorb any moisture, so that the seeds remain dry.
If I wanted to keep my seeds for a long time, I would have to switch on the refrigerator. The Svalbard Global Seed Vault is located on Spitsbergen, where all kinds of seeds are stored frozen.
However, we don’t need that many seeds for a vegetable garden of a few square meters and we use it in the following season. Usually, I harvest a bit of seed and put it in a small paper bag. Those bags are also nice to give as presents.
A paper bag is better than a plastic one, because the paper may absorb moisture where plastic holds it inside.
Tip: always write the name and date of harvest on the jar or bag. In the past, I have thought too often “I’ll remember that”, which always turned out to be wrong.
Folding a seed bag
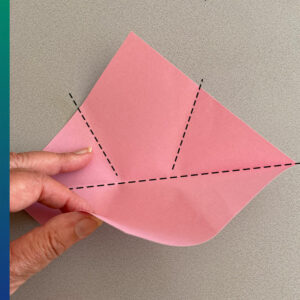
Fold a square sheet of paper diagonally.
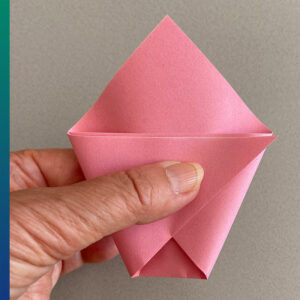
Wrap the corners together to form a coffee filter shape.
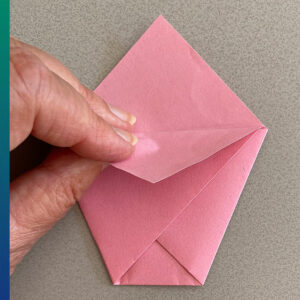
Bend the top triangle . . .
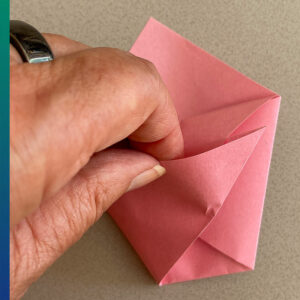
and slide it into the folded bottom triangle.
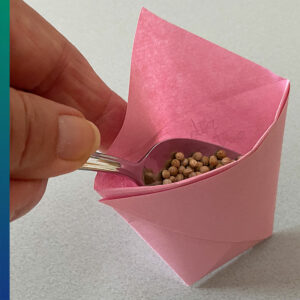
Write the name and date on the other side and place the seeds in the resulting bag.
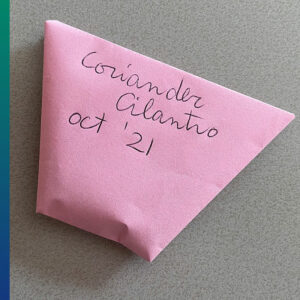
Fold the ‘lid’ into the bottom triangle to close the bag.
The fun of a vegetable garden
Working with the seeds is one of the most enjoyable processes of vegetable gardening. Especially because we can get results quickly and follow the process so well if we pre-germinate the seeds.
Harvesting seed requires more patience. I will talk about it in another article.
Have you already tried to pre-germinate seed? Tell us about it in the comment box below.
P.S. We can also eat seeds. Depending on the composition of the soil, they contain many useful nutrients.
Related: Best Seeds to Eat for your Daily Dose of Healthy Supplements

